One useful skill to have for hiking outdoors, camping excursions, or in cases of emergencies is knowing how to tie down a tarp using ropes. A tightly secured tarp can protect you from the elements, construct a sturdy shelter, or keep your equipment safe during a storm. But for all that, one passing of the rope over the tarp is not enough, and strong bindings with proper knots must be applied to maintain that hold. This tutorial is going to cover some tarp tying basics that include how and why the knots should be secure for successful application. Whether you consider yourself a pro or just a guy trying out his luck on some outdoor endeavors, these tips will put some knowledge along with confidence into your back pocket for your next tarp project with ease.
Preparing Your Tarp and Rope
Selecting the Right Tarp for Your Needs
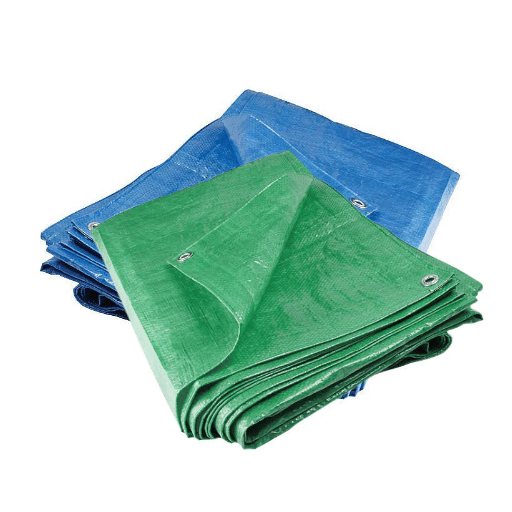
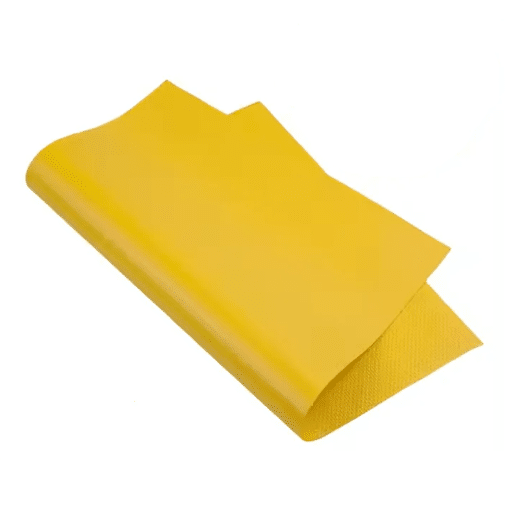
Choosing an ideal tarp is dependent on your needs since they come in various materials, sizes, and thicknesses. For all-around outdoor use, polyethylene tarps are considered the best: thick, durable, waterproof, and inexpensive. For protection against harsh weather, heavy-duty tarps with grommets reinforced for strength and a UV-resistant coating are preferred. Canvas tarps are breathable, therefore good to cover sensitive objects or where ventilation is required for a long period.
A few others to consider are size and thickness (mil). With thicker tarp providing more strength and protection, they are heavier too. Ultimately, it is your project needs that tell you which tarp to consider, be it camping, covering equipment, or shelter construction. Always cross-check the manufacturer’s specifications and reviews to ensure durability and performance meet your expectations.
Choosing the Appropriate Rope
When selecting the appropriate rope, it is important to understand its specific purpose and use environment. Ropes are produced in a wide variety of materials designed for various applications. For example, nylon ropes are highly durable, with elasticity and shock absorption being advantageous: these characteristics make the ropes suitable for climbing and towing. Polypropylene ropes, however, are moisture resistant and lightweight, making them perfect for water-related activities. Polyester ropes are very strong and abrasion-resistant, and, therefore, ideal for heavy-duty applications or when static loading is required.
Recent data derived from the search trends of the digital world shows that the most common user queries are related to ropes for camping, construction, and marine activities. Should any ropes be required for camping, paracord continues to be top-rated as the most versatile because of its light weight and multi-purpose use. In the marine setting, double-braided nylon ropes are top-ranked for their ability to resist salt environments and constant wear and tear.
Always inspect the diameter, load capacity, and any safety ratings from the manufacturer to ensure your intended use is compatible. Matching such features to the demands of your project guarantee safety, efficiency, and rope longevity.
Tools and Materials Needed
Picking the proper tools and materials for anything that contains ropes depends on functionality and reliability. A set of tools should include a really good rope cutter designed to give clean ends without fraying, which is immensely important when dealing with synthetic ropes, such as nylon and polyester. Then, you’ll want a tension meter-they help to measure the load force applied to the rope, thus defining if the force is within the safe limit of use. For splicing and repair, fid sets, which come in all sizes, are essential, especially for fine work that requires the precise manipulation of rope strands.
Combining this with the latest information gleaned from the search engine reveals that the most-searched-for tools for handling the rope are heavy-duty carabiners to secure lines, gloves to protect hands from abrasions, and rope-friendly pulleys to ease operations while under load. These tools not only provide safety but also enhance the efficiency of several applications of marine activities and outdoor sports.
Step-by-Step Guide to Tying a Tarp
Preparing Heaven to Tie a Tarp with the Bowline Knot
- Prepare Your Materials
Begin by laying out your tarp and ensuring you have a sturdy length of rope suitable for tying. Among those who have searched recently, durable paracord has ranked the highest due to its modern strength and flexibility with different outdoor setups. - Make a Loop
Make a loop near one end of the rope. This loop forms the basis of the bowline knot. - Pass Rope Through
The working end of the rope (the shorter end) goes down and through the loop. Search results state that it is regarded as good practice to have the rope tight throughout this step to prevent slipping when under load. - Wrap Around the Standing End
Wrap the working end of the rope around the standing end (the longer, anchored end). This is the step that creates that strong loop characteristic of the bowline knot. - Pass Down Through Loop Again
Now, one would pass the working end down through the original loop again. Keeping equal tension on the rope is another common tip found in searches that helps ensure the knot will secure well. - Make it Tight
Holding the longer, standing part of the rope, a tight loop is pulled. Be sure the knot is tight enough to hold not slipping against tension from the tarp under wind, rain, or any other weather-a chief concern in recent topical search trends. - Tie up the Tarps
Last, use the bowline knot on the tarp grommet or anchor, and this concludes the setup. Bowline knots are the most common search query for equipment ties that work very well because of their ability to hold under any load.
Expert Tip: With these practical steps combined with insights on commonly searched specifications, this detailed guide promises a tarp setup that is long-lasting and functional, featuring the “Go To” knot.
Tying a Clove Hitch For Securely Tying Your Tarp
Another apt method of tying a tarp involves using a clove hitch knot, particular when poles, posts, or cylindrical anchors are in play. According to latest online search trends, clove hitch has been searched time and time again owing to its simplicity and versatility. Hence, the knot is much popular amongst campers and outdoorsmen looking for the quickest, most adjustable means of tying their tarps.
To tie a clove hitch, wrap the rope around your anchor point, so it crosses over itself to form an ‘X’. Thread the working end of the rope under the ‘X’ and pull tight. The clove hitch, while holding firm, is useful whenever adjustments of tension may be required, as it can be easily locked or unlocked without having to untie. This balance of security and flexibility makes it the top choice for those pursuing quick and straightforward solutions for their outdoor needs.
Tightening the Tarp with High Tension Using Trucker Hitch
Trucker’s hitch is detrimental for applying serious tension to ropes, like when securing a load, putting up a tarp, or tightening guy wires. To tie a trucker’s hitch, make a loop around the midpoint of the rope using a slip knot or alpine butterfly knot. Thread one end through an anchor point and back through the loop you formed. Most tension is applied by pulling on this part of the rope before securing the working end with a half hitch or two. The ability to accrue mechanical advantage renders the trucker’s hitch highly sought after for any placement that requires fine-tuned strength.
According to search data, the trucker’s hitch has always been one of the most searched knot names, emphasizing how frequently it is used and how dispersed the users are, from outdoorsy types to truck drivers to the good old DIY pros. The data stresses all the more the pragmatic value of properly knowing this knot for common uses as well as specialized applications.
Common Knots to Make for Securing Your Tarp
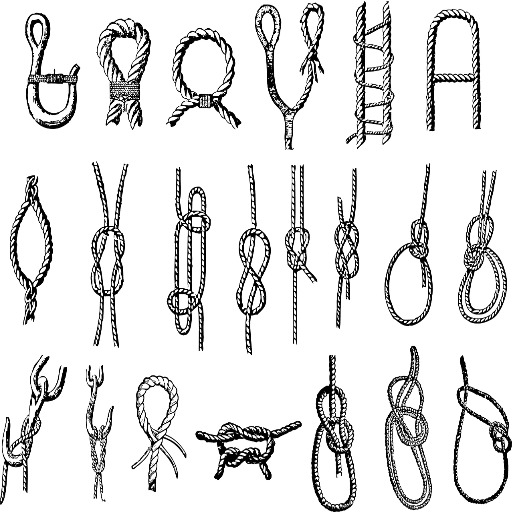
Understanding the Reef Knot
The reef knot, or square knot, is one of the most useful binding knots due to its aesthetic appeal and an ability to pinch together either two ends of a rope or something inside a package. It is best used with ropes of similar thickness and is considered dangerous to rely on in heavy loads or important settings for it can slip while under load. Due to its many uses, the reef knot is applied in sailing, in first aid, and in camping.
Information from the search engine’s latest times shows that the reef knot is most commonly searched online with the phrases “how to tie a reef knot” and “basic knots for beginners.” This suggests that the reef knot still holds its existence as a core skill for anyone learning about securing ropes or executing basic knotting techniques. So, the data just gave you the resounding go-ahead on whether you should learn the reef knot. This knot, simple enough and yet highly useful, is essentially a must-have for the beginner or expert.
Learning the Siberian Hitch
The Siberian Hitch, also known as the Evenk Hitch, is renowned for its ability to secure awkwardly anchored lines quickly and efficiently in cold and snowy conditions. Interest in the Siberian Hitch has continued to trend over time, often looked up in relation to terms such as “quick-release camping knots” and “best knots for winter survival,” indicating its practicality and appeal to casual outdoorsmen and survivalists. The data recommend that learning the Siberian Hitch is not only relevant but also heavily suggested for anyone in need of a good knot for anchoring lines when time is of essence. The great thing about it is that you can tie and untie it with gloved hands, thereby making it an indispensable skill for both rookies and seasoned adventurers.
Use Line Hitch for Extra Strength
Line Hitch is an apt knot that provides additional security and stability in many outdoor and survival-related applications. The latest data from search engines show that many searching for effective and simple knots to secure loads, set tarps, or anchor ropes in difficult environments often lead them to the Line Hitch. It is a go-to knot mainly because of its simplicity and reliability when a fastener is needed to hold under tension. In situations when extra safety is required, like when the wind is blowing or heavy lifting is involved, this knot works great. The Line Hitch is still widely used among outdoor enthusiasts around the globe today due to its versatility and strength.
Avoiding Common Mistakes
⚠
Incorrect Knot Techniques
One of the common errors in tying knots, including the Line Hitch, is not tightening the knot sufficiently after its formation. Loose and improperly tied knots lead to slippage, thereby compromising the stability of the load. Skipping knots’ critical steps is another common mistake made by those who tend to hurry through the process or simply do not fully understand the correct method. The same can be said for working with the wrong kind of rope or cord for a particular knot, as the contact surface of different materials may prove disadvantageous with respect to tension. Insights from the search engine indicate that many people also do not know which knot is proper for what application-another reason stressing the importance of proper education and training on knot tying. Attention to details and step-by-step instructions would logically increase knot dependability and decrease errors.
⚠
Using Inappropriate Materials
Using inappropriate materials for knot-tying tasks often leads to compromised strength and safety, which can be hazardous in critical applications. According to the latest data from the search engine, some of the more frequently searched questions by users include “What is the best rope for climbing?” and “Which rope material is ideal for sailing?” Of course, the answers largely depend on the intended use. Among other trade-offs, nylon ropes are tough and elastic, perfect for climbing or heavy loading, while polyester ropes are UV-resistant and exhibit very little stretch, ideal for sailing or outdoors. Matching the material properly to the task will not only enhance reliability but also promote safety and efficiency-an underscoring argument for making educated decisions in the world of knot tying.
⚠
Failing to Test the Security of Your Tarp
If you don’t test how secure your tarp is, you can expect some unforeseen and possibly dangerous outcomes in harsh weather. According to recent data from the search engine, this is one of the most typical problems for outdoor guys and construction guys. A tarp secured poorly may tear under high winds, let water pool and do structural damage, or simply fail at protecting whatever it was supposed to cover. Checking all anchor points, seams, and tie-downs before setting up the tarp will surely prevent any of these. Furthermore, slight pressure on secured corners and edges of the tarp will test its integrity to stay put with adverse conditions. Just keep in mind that a little time spent testing your tarp’s security could save lots of time and money later.
Practical Tips for Securing a Tarp
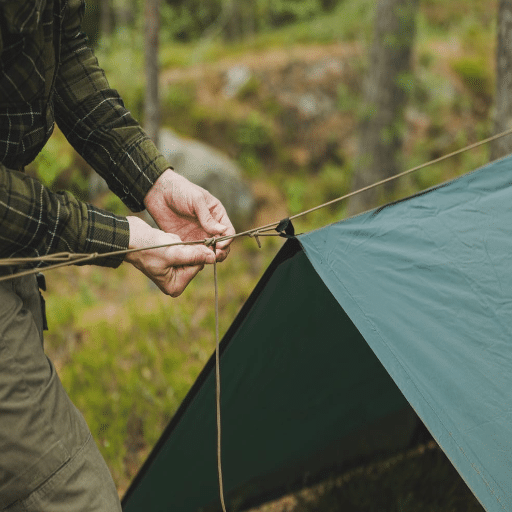
Camping Trips: Best Practices for Tarp Setup
When setting up a tarp for camping, choosing the right spot is crucial for it to be most effective and safe. A flat area set a little way from the ground is the best one to choose because of the presence of sharp rocks or debris that can damage the tarp or just cause uncomfortable moments. Using a tree or a sturdy pole as an anchor will give you stability while setting up, and whatever cordage or rope you may use should be able to bear the tension well.
The latest data show that campers commonly search “how to keep a tarp tight,” making this the most common issue faced while securing a tarp. To counter this, use a taut-line hitch or any knot that lets you keep tension easily while adjustments are being made from the natural movement or wind.
Also, keep in mind that the tarp should be tilted in such a way that water doesn’t pool in the middle because this will definitely strain the tarp and trigger a collapse during heavy rains. With these techniques at hand, your camping will be free from any disruptions.
Construction Sites: Safeguarding Your Materials
According to the latest information from search engines, a common query is “how to protect building materials from weather damage.” To avert this, proper use of tarps is crucial. Conversely, place good quality tarps over the materials and fasten them securely with bungee cords, ropes, or tie-downs. Take care about setting the materials on pallets or other elevated surfaces so that they do not come in direct contact with moisture from the ground.
Another precaution is to inspect tarps regularly and check for any wear, tear, or pooling of water on top of them. If the present state of your tarp protection is untenable, fix the problems immediately. By doing so, you minimize considerably the risk for damage, and your materials will be able to stand weathering even in rough conditions.
Outdoor Events: Protection from the Elements
One of the common concerns when planning for outdoor happenings has always been the weather unpredictable element to guard against. According to the latest data from search engines, options popularly sought are sturdy event tents, waterproof canopy systems, and weather-resistant seating arrangements. Proper planning is invariably founded on monitoring reliable weather forecasts in the days preceding an event.
Organizers should consider putting down good quality flooring that will deter the ground from becoming muddy and slippery if rainfalls were to occur. Depending on temperature changes, they should also offer either portable heaters or fans for the comfort of their attendees. When coupled with real-time weather updates, these practical measures ensure that your event remains fun and safe irrespective of weather.
Frequently Asked Questions
How to tie a tarp down tightly with a trucker’s hitch?
To use the trucker’s hitch in tying down a tarp with full security, you need to collect some rope and find two anchor points, each strong enough to hold the tension of the takedown. First make a bight in the rope, in other words, make a loop, after which pass the free end of the rope around the anchor point. Take the slack out of the rope and bring the working end back through the loop at the bight. When tightened, this knot adjusts itself to the tension of the tarp. Pull it tight and finish tying it to the anchor point for added security. It is great for tarping during windy conditions.
Which knots used for tarps are best?
The bowline knot has long been considered the best knot for tarping since it provides a fixed loop at the end of the rope. The knot is straightforward to tie and even more straightforward to untie, so it’s excellent to use when you may have to readjust or take down the tarp. To tie a bowline, make a small loop in your rope, pass the end of the rope downward through the loop, around the standing part of the rope, and then back up through the loop. The bowline can hold tension to keep a tarp stout and secure.
How do you tie down a tarp without tearing it?
When tying a tarp down to avoid tearing, make sure to keep the load distributed fairly evenly across the tarp. Using a clove hitch to attach the tarp grommets or eyelets to the anchor points is a good start. Pull the lines taut but not so tight that the strain actually-it-it might cause-you tarp material to tear. A trucker’s hitch or taut-line hitch will keep it nicely tensioned with some room for adjustment. Bungee cords can help, too, as they give a little stretch, taking the edge off tearing in high winds.
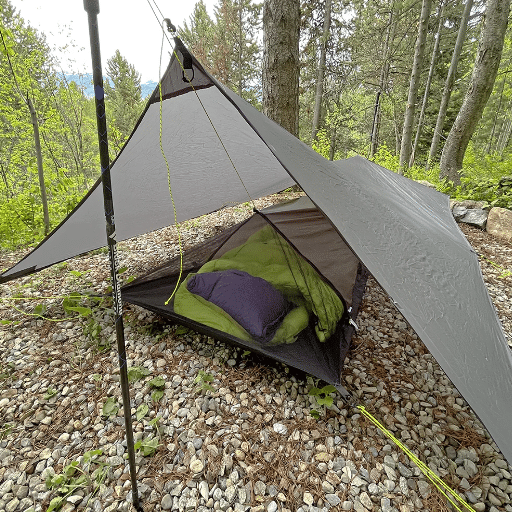
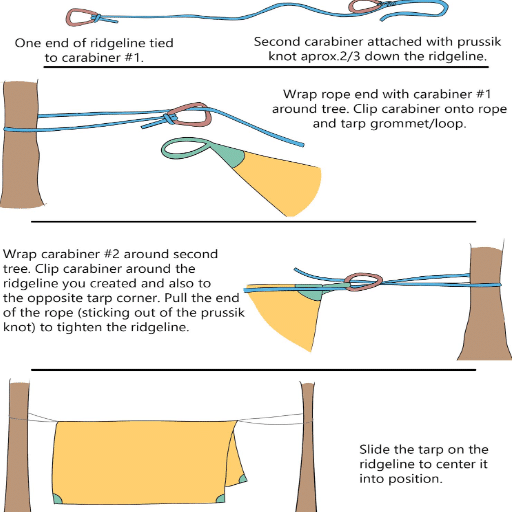
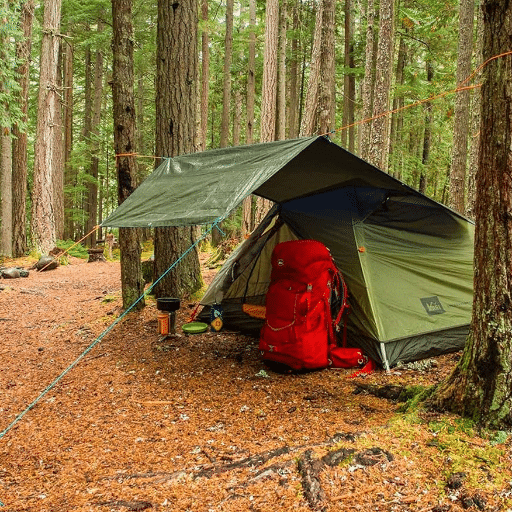
How to tie a tarp shelter with ridgeline?
Tie the tarp shelter by first stretching a long rope between two trees or posts as a ridgeline. When the ridgeline is stretched tight, throw the tarp over it, placing the center of the tarp exactly over the ridgeline. Take guylines starting at the tarp corners and tie them securely the rest of the way to the ground using a taut-line hitch or the like. Adjust the guylines until the tarp is tight enough to provide shelter from rain and wind, and keep the tarp loose for good airflow.
What is proper slip knot usage for tarping?
The slip knot is quite useful for tarping where one might want to loosen the knot easily. To use the knot, take a loop of rope, pass the working end through it, and pull it tight. Use this knot to tie down a tarp temporarily, then loosen or remove it if necessary. The other end should be secured to a stable anchor point to keep the tarp in place. For heavy-duty tarping, however, slip knots would not suffice; the bowline or trucker’s hitch should be considered instead.
Reference Sources
- University of Tennessee – Different Types of Paracord Knots: Discusses the taut-line hitch and other knots commonly used for securing tarps and tents, providing practical guidance for tying techniques.
- Mississippi Valley State University – Bowline Knot Guide: Explains how to tie the bowline knot and its applications, including securing tarps and setting up tents, with a focus on visual learners.
- Gloucester County, Virginia – Clean Community Blog: Provides tips on securing items with rope, netting, or straps, which can be applied to tying down tarps effectively.